As winter melts into spring, your dog's paws face a trifecta of hazards: chemical burns from road salt, cuts from hidden ice, and dermatitis from wet mud. Veterinary nurse Emma Lawson details the essential daily routine to keep paws healthy during the transition.
Key Takeaways
- Salt is Toxic: Road grit and de-icers cause chemical burns on pads and are toxic if licked off.
- Moisture is the Enemy: Constant dampness promotes yeast and bacterial infections (interdigital dermatitis).
- Barrier Protection: Paw balms or booties are your first line of defense before leaving the house.
- The 3-Step Routine: Prep, Walk, and Post-Walk Hygiene are non-negotiable during the thaw.
The transition from winter to spring, often called 'The Big Thaw', is arguably the most challenging time of year for canine paw health. In my 12 years as a veterinary nurse, I have treated more cracked pads, chemical burns, and infected nail beds in March than in the depth of January. Why? Because melting snow creates a concentrated slush of road salt, grit, and urban runoff that clings to fur and pads far more stubbornly than dry snow ever does.
While we often worry about other seasonal hazards like Pine Processionary Caterpillars appearing as the weather warms, the immediate danger right now is the ground they walk on. This guide covers the practical, step-by-step care required to navigate the slushy, muddy mess of the thaw safely.
The Triple Threat: Salt, Ice, and Mud
1. Chemical Burns (Road Salts)
Municipal de-icers are rarely just salt. They often contain magnesium chloride, potassium chloride, and anti-caking agents. When mixed with melting snow, this creates a brine that can chemically burn your dog's paw pads. More dangerously, if your dog licks this brine off their paws later, it can lead to gastrointestinal upset or electrolyte imbalances.
2. Mechanical Injury (Ice Shards)
As snowbanks melt and refreeze overnight, they form razor-sharp crusts. Puddles often hide broken glass or sharp gravel that was previously cushioned by snow. I frequently suture paw lacerations during this season because soft, wet pads are more susceptible to slicing than dry, callous ones.
3. Dermatitis (The Mud Factor)
Mud is not just dirty; it is a breeding ground for bacteria and fungi. When mud dries between the toes, it forms hard clumps that act like sandpaper, abrading the skin. Furthermore, leaving paws damp encourages Malassezia (yeast) overgrowth, leading to that tell-tale 'corn chip' smell and intense itching.
Step-by-Step: The Thaw Survival Routine
Managing paw health is about routine. You cannot avoid the ground, but you can manage the impact.
Phase 1: Pre-Walk Preparation
Trim the Grinch Feet:
Long hair between the pads acts as a wick, soaking up saltwater and mud. Keep these tufts trimmed flush with the pads. If you are not comfortable doing this with scissors, use small electric clippers. This simple step reduces the surface area for irritants to cling to by about 50%.
Apply a Barrier Balm:
Think of paw wax as an invisible boot. High-quality paw balms (look for ingredients like beeswax, lanolin, or vitamin E) create a hydrophobic seal. Smear a generous amount on the pads and between the toes before you head out. This prevents ice balls from forming and stops salt from making direct contact with the skin.
Consider Booties:
If your dog tolerates them, rubber or neoprene booties are the gold standard. However, many dogs freeze up and refuse to walk. If you are trying booties for the first time, put them on for feeding time indoors first to create a positive association.
Phase 2: During the Walk
Scan the Terrain:
Avoid puddles that have an oily sheen (runoff) or white crust (salt). Stick to fresh snow or clear pavement where possible. Be vigilant near garden beds; as snow melts, hazards like toxic spring bulbs (tulips and daffodils) may become accessible and tempting to dig up.
The 'Stop and Check':
If your dog suddenly starts limping or holding a paw up, stop immediately. Check for ice balls packed between the toes. Do not pull them out if they are frozen solid to the hair, as this pulls the skin. Instead, crush the ice ball gently with your fingers to break it apart.
Phase 3: The Post-Walk Decontamination
This is the most critical step. You must remove the chemical cocktail from the paws immediately.
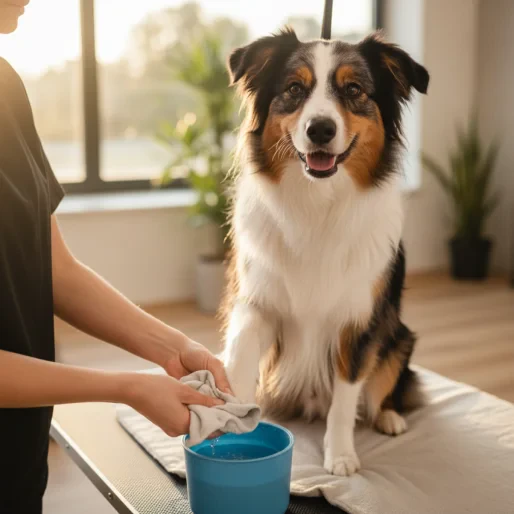
The Plunge Bath Method:
Wiping with a towel is rarely enough to remove dissolved salt. I recommend the 'Plunge Bath' technique:
- Keep a shallow plastic tray or bowl of lukewarm water by the door.
- Dip each paw individually, swirling it to loosen mud and dissolve salt.
- Pro Tip: Add a drop of dog-safe shampoo or a dilute chlorhexidine solution if the mud is particularly foul.
Drying is Crucial:
Bacteria love moisture. Use a microfiber towel to dry the paws thoroughly. Don't forget the spaces between the toes. If your dog has deep webbed feet (like Labradors or Spaniels), checking these crevices is mandatory to prevent fungal infections.
Inspect and Moisturise:
Once dry, inspect the pads for cuts or cracking. If the pads feel rough or sandpaper-like, apply a post-walk moisturiser. Warning: Do not use human moisturisers, which may soften the pads too much, making them prone to injury, or contain toxic ingredients like zinc oxide.
Troubleshooting Common Issues
Cracked Pads (Hyperkeratosis)
If the pads are deeply cracked, they can bleed and become infected.
Home Care: Clean with saline, apply a pet-specific antibiotic ointment, and sock the paw (use a baby sock secured with vet wrap, never tight enough to cut off circulation) to prevent licking.
Vet Visit Needed: If there is pus, the dog is lame, or the crack does not improve after 3 days.
Interdigital Cysts
These look like angry red boils between the toes. They are often caused by ingrown hairs or foreign bodies (like grit) driven into the skin by friction.
Home Care: Epsom salt soaks (cool water) can help draw out inflammation.
Vet Visit Needed: Almost always. These are painful and frequently require systemic antibiotics.
Salt Toxicity
If your dog licks their paws obsessively after a walk and then starts vomiting, drooling, or acting lethargic, they may have ingested a dangerous amount of road salt. This is an emergency. Contact your vet immediately.
When to Call the Vet
While most thaw-related issues are manageable at home, certain signs require professional intervention:
- Deep Lacerations: Any cut that gapes open when the dog puts weight on it likely needs sutures or surgical staples.
- Persistent Licking: This is a sign of pain or deep infection.
- Discoloration: Pads that turn pale, blue, or black (necrosis) need immediate attention.
- Foul Odor: A yeast infection smells like corn chips; a bacterial infection often smells like rotting fruit or old cheese.
The Big Thaw is messy, but it signals that warmer days are coming. By adopting this rigorous hygiene routine, you protect your dog from immediate pain and ensure their feet are in prime condition for the spring adventures ahead.
Frequently Asked Questions
Can I use Vaseline on my dog's paws for snow protection? ↓
How do I tell if my dog has salt burn? ↓

Emma Lawson
Practical Pet Care Educator
Practical pet home care specialist — clear, step-by-step guidance grounded in veterinary nursing standards.
Content Disclosure
This article was created using state-of-the-art AI models with human editorial oversight. It is intended for informational and entertainment purposes only and does not constitute veterinary medical advice. Always consult a licensed veterinarian for your pet's specific health needs. Learn more about our process.