Build a complete canine fitness course in your garden using affordable hardware store materials. This step-by-step guide covers agility jumps, weave poles, balance platforms, and cavaletti rails suited to dogs of all sizes.
Key Takeaways
- A full four-station DIY agility course (jumps, weave poles, balance platforms, cavaletti rails) can be built for under £60 to £100 using common hardware store materials.
- Always get veterinary clearance before starting a fitness programme, especially for puppies under 12 to 18 months, senior dogs, or dogs with joint conditions.
- Each obstacle targets different fitness components: jumping for explosive power, weaving for flexibility, balance platforms for proprioception, and cavaletti rails for controlled gait work.
- Short, reward-based sessions of 5 to 15 minutes are safer and more effective than long training blocks.
- Proper ground preparation and equipment checks before each session help prevent injuries.
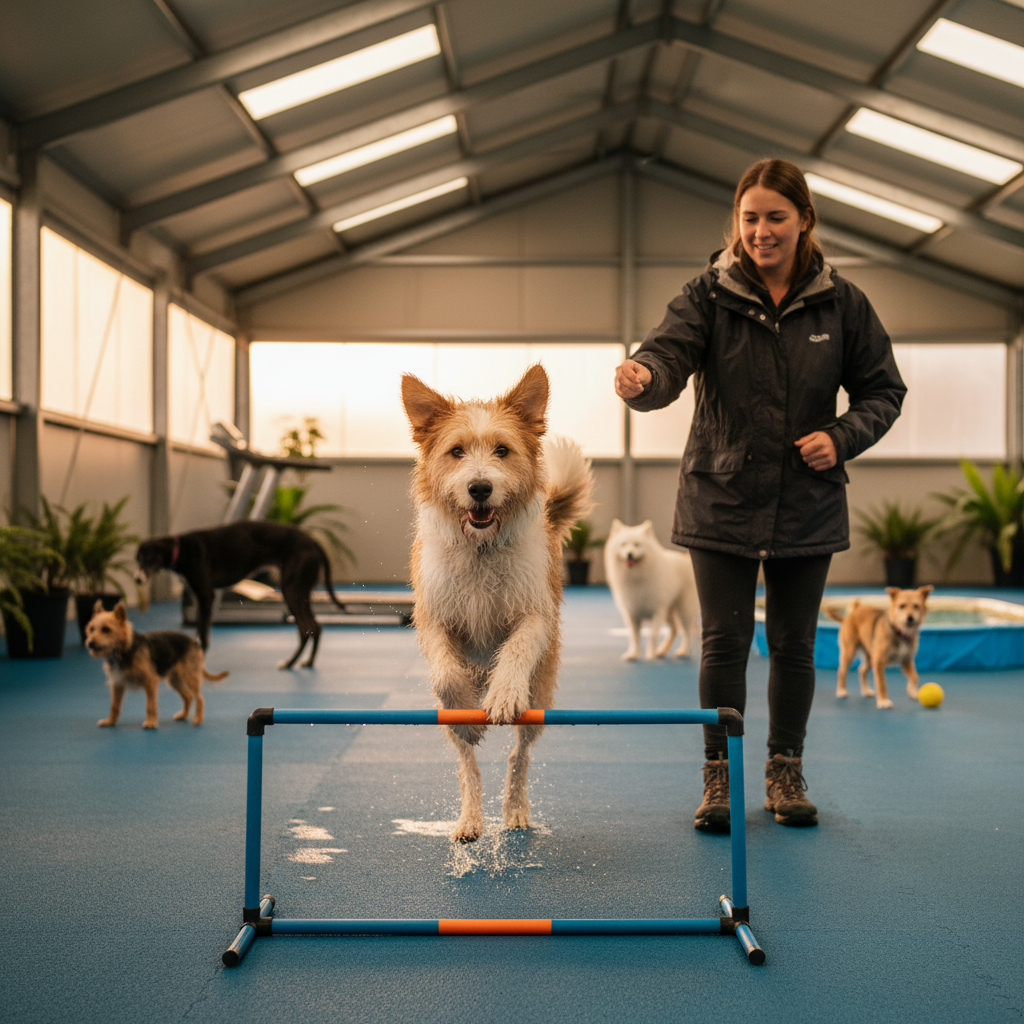
Why a Garden Fitness Course Benefits Your Dog
Canine fitness is about more than burning energy. A well-designed obstacle course challenges a dog's coordination, builds core strength, improves proprioception (the body's sense of where its limbs are in space), and provides valuable mental stimulation. Veterinary physiotherapy guidelines consistently highlight that controlled physical challenges reduce injury risk and support joint health, particularly in active breeds and working dogs.
Spring is the ideal time to set up a garden course. The ground is firmer than in winter, daylight hours are lengthening, and moderate temperatures keep dogs comfortable during exercise. Building the equipment yourself also means every obstacle can be adjusted to your dog's exact size and ability level, something most off-the-shelf kits cannot offer.
Before You Start: Safety and Veterinary Clearance
Veterinary Check First
Professional consensus strongly recommends a veterinary check before beginning any structured fitness programme. This is especially important for:
- Puppies whose growth plates have not yet closed (typically under 12 to 18 months, varying by breed).
- Senior dogs or dogs with known orthopaedic conditions such as hip dysplasia, luxating patella, or arthritis.
- Overweight dogs, where sudden high-impact exercise may stress joints.
- Brachycephalic breeds (flat-faced dogs like Bulldogs or Pugs) that may overheat or struggle with intense exertion.
If your dog is recovering from surgery or managing a chronic condition, a qualified canine physiotherapist should design a bespoke programme. For general guidance on managing veterinary costs associated with check-ups, see Vet Visit Costs: Budget Alternatives Pet Owners Need.
Garden Preparation
Choose a flat, well-drained area of lawn at least 6 metres by 4 metres. Remove stones, sticks, garden tools, and any toxic plants. Check for holes or uneven ground that could cause a stumble. If your lawn is slippery after rain, wait for it to dry or lay rubber matting beneath key obstacles. Keep the course well away from fences, walls, and garden furniture to give your dog a safe run-off zone on every side.
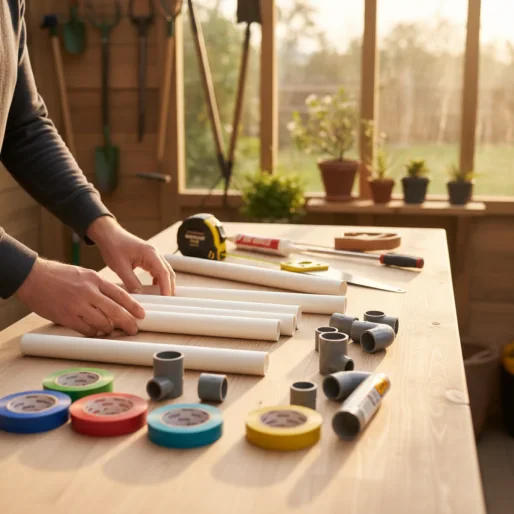
Materials and Tools You Will Need
Everything listed below is available from a standard hardware or DIY store. Costs will vary by region but a complete set of four obstacles typically falls in the £60 to £100 range.
General Tools
- Tape measure
- Pencil and marker
- Hand saw or mitre saw
- Cordless drill with drill bits
- Sandpaper (120 grit) or a sanding block
- Wood screws (various sizes, stainless steel or coated to resist rust)
- Wood glue (exterior grade, non-toxic when cured)
Obstacle-Specific Materials
Exact quantities are listed within each obstacle section below. As a general overview:
- PVC pipes: 25 mm and 40 mm diameter, various lengths
- PVC connectors: T-joints, elbow joints, end caps
- Timber: treated softwood battens (approximately 25 mm x 50 mm and 50 mm x 100 mm)
- Plywood: 18 mm exterior grade
- Non-slip adhesive tape or rubber shelf liner
- Spray paint (non-toxic, water-based, for visibility)
- Cable ties and bungee cords
Station 1: Adjustable Agility Jumps
What They Train
Jumping builds hindquarter power, encourages proper take-off and landing mechanics, and improves a dog's spatial awareness.
Materials
- 4 x PVC pipes, 40 mm diameter, cut to 100 cm (uprights)
- 2 x PVC pipes, 25 mm diameter, cut to 90 cm to 120 cm depending on desired width (jump bars)
- 4 x PVC T-joints to fit 40 mm pipe
- 4 x PVC end caps for 40 mm pipe
- 2 x flat timber feet, 40 cm long (to prevent tipping)
Step-by-Step Build
- Cut uprights: Cut four 100 cm lengths of 40 mm PVC pipe. Sand cut edges smooth.
- Attach T-joints: Press a T-joint onto the top of each upright. These create the cups that hold the jump bar. Do not glue them; friction fit allows height adjustment.
- Create bases: Attach a PVC end cap to the bottom of each upright. Screw or cable-tie each upright to a flat timber foot (40 cm x 8 cm x 2 cm) to prevent toppling.
- Set the jump bar: Rest a 25 mm PVC pipe across the T-joints of two uprights. The bar must rest loosely so it falls if the dog clips it, reducing injury risk.
- Adjust height: Drill pairs of small holes at 10 cm intervals along each upright. Insert short dowel pegs to create alternative resting points for the bar. Start the bar at your dog's elbow height or lower.
- Visibility: Wrap the jump bar in coloured tape or spray with non-toxic paint so it is easy for the dog to see. Dogs see blue and yellow most clearly.
Training Tip
Most owners set the bar too high initially. Veterinary sports medicine guidance recommends starting at or below elbow height and increasing by no more than 5 cm per week. The bar should always be displaceable: a fixed bar that does not fall on contact is a common cause of soft-tissue injury.
Station 2: Weave Poles
What They Train
Weaving develops lateral flexibility, core engagement, and body awareness. It requires the dog to shift weight smoothly from side to side.
Materials
- 6 to 10 x PVC pipes, 25 mm diameter, cut to 80 cm to 100 cm tall
- 6 to 10 x short timber stakes or garden spike bases
- Cable ties
Step-by-Step Build
- Prepare poles: Cut 6 to 10 lengths of 25 mm PVC pipe to 80 cm (small dogs) or 100 cm (larger dogs). Sand all edges.
- Create ground anchors: Drive short timber stakes (about 30 cm) into the ground in a straight line, spaced 50 cm to 60 cm apart. For harder ground, pre-drill with a metal spike.
- Attach poles: Slide a PVC pipe over each stake so it stands upright. Secure with a cable tie at the base. The pole should flex slightly if bumped, not be rigid.
- Spacing adjustment: For beginners, use wider spacing (60 cm) and fewer poles (6). As the dog gains confidence, reduce spacing to 50 cm and increase to 10 poles.
- Channel method for training: Place a low guide wire or a line of flower pots on each side of the poles to create a channel. This helps guide the dog through the correct path early on. Remove the channel guides gradually over several sessions.
Training Tip
Owners commonly report frustration when their dog runs around the poles instead of through them. Luring with a treat held close to the dog's nose, moving slowly in a serpentine pattern, is the most effective introduction method. Keep initial sessions to 3 to 5 repetitions. Weaving is physically demanding, and overdoing it can strain the lumbar spine.
Station 3: Balance Platforms
What They Train
Balance work strengthens stabiliser muscles, improves proprioception, and is widely used in canine rehabilitation settings. It is particularly beneficial for dogs recovering from orthopaedic procedures (with veterinary approval) and for senior dogs losing coordination.
Materials
- 1 x piece of 18 mm exterior plywood, cut to 60 cm x 60 cm (or 40 cm x 40 cm for small dogs)
- 1 x length of 50 mm x 100 mm timber, cut to 50 cm (the rocker base)
- Non-slip adhesive tape or rubber shelf liner
- 4 x wood screws
- Sandpaper
Step-by-Step Build
- Prepare the platform top: Cut plywood to size. Sand all edges and corners until completely smooth, removing any splinter risk.
- Shape the rocker base: Round off the bottom edges of the 50 mm x 100 mm timber with sandpaper or a plane to allow gentle rocking. The rocker should allow roughly 10 to 15 degrees of tilt, not a dramatic wobble.
- Attach base to platform: Centre the rocker timber underneath the plywood. Screw through the top of the plywood into the timber using 4 screws. Countersink the screws so no heads protrude above the surface. Apply wood glue for extra strength.
- Apply non-slip surface: Cover the entire top surface with adhesive non-slip tape in strips, or glue down rubber shelf liner. This is essential. A dog stepping onto a slippery platform will lose confidence and may injure itself.
- Test stability: Place the platform on flat ground. Step on it yourself to check the rocking motion is gentle and controlled. If it tips too aggressively, sand more off the rocker base to flatten the curve.
Training Tip
Place the platform upside down (flat side up) for the first few sessions so the dog learns to step onto an elevated surface without any wobble. Once confident, flip it over to introduce the balance challenge. Reward all four paws on the platform. Never force a nervous dog onto an unstable surface.
Station 4: Cavaletti Rails
What They Train
Cavaletti exercises originate from equine training and have been widely adopted in canine physiotherapy. Walking over evenly spaced low rails encourages deliberate paw placement, improved stride length, and greater awareness of hind limbs, an area many dogs neglect.
Materials
- 4 to 6 x wooden dowels or PVC pipes, 25 mm diameter, cut to 80 cm to 100 cm long
- 8 to 12 x small plywood or timber blocks (10 cm x 10 cm x 5 cm high for low rails, or 10 cm x 10 cm x 10 cm for raised rails)
- Sandpaper
- Non-toxic paint (optional, for visibility)
Step-by-Step Build
- Prepare the rails: Cut dowels or PVC pipes to equal lengths (80 cm to 100 cm). Sand all edges smooth.
- Create support blocks: Cut timber or plywood into small blocks. For each rail you need two blocks (one at each end). Cut a shallow V-notch or U-shaped groove in the top of each block to cradle the rail. Sand smooth.
- Set spacing: Arrange 4 to 6 rails in a straight line. Spacing between rails should roughly equal the dog's body length from shoulder to hip. For most medium dogs this is around 30 cm to 45 cm. For large breeds, increase to 45 cm to 60 cm.
- Set height: Start with rails at ground level (blocks flat, rail resting on grass). Progress to the 5 cm blocks, then to 10 cm. The rail should never be higher than the dog's hock (ankle joint).
- Paint for visibility: Alternate rail colours (blue and yellow work best for canine vision) so the dog can clearly see each rail.
Training Tip
Walk beside the dog on a loose lead at a slow, steady pace. Rushing through cavaletti defeats their purpose. The goal is a slow, deliberate walk with the dog consciously lifting each paw. Most owners struggle with this the first time because the instinct is to let the dog trot. Use a treat held low and slightly ahead to maintain a walking pace.
Putting It All Together: Course Layout
Arrange the four stations in a circuit with at least 2 to 3 metres between each obstacle. A suggested order for beginners:
- Cavaletti rails (warm-up, slow and controlled)
- Weave poles (lateral movement, moderate intensity)
- Balance platform (static challenge, brief hold)
- Agility jump (dynamic burst, most demanding)
Finish each circuit with a calm cool-down walk around the garden perimeter. Two to four circuits per session is ample for most dogs.
Session Guidelines
- Duration: 5 to 15 minutes total for beginners; build up gradually over weeks.
- Frequency: 3 to 4 sessions per week with rest days in between.
- Warm-up: A 5-minute on-lead walk before starting.
- Cool-down: A gentle walk and access to fresh water.
- Rewards: Use small, soft treats or a favourite toy. Keep the tone positive and pressure-free.
- Surface: Work on dry grass. Avoid wet, muddy, or frozen ground.
What to Watch for During and After Sessions
During Exercise
- Reluctance or avoidance: A dog that repeatedly refuses an obstacle may be in pain or fearful. Never force participation.
- Limping or uneven gait: Stop immediately and assess.
- Excessive panting or drooling: Could signal overexertion or overheating, even in spring. Offer water and rest in the shade.
- Vocalisation on landing: Yelping after a jump may indicate joint pain.
After Exercise
- Stiffness the following day: Mild stiffness after the first session can be normal, similar to human muscle soreness. If it persists beyond 24 hours or worsens, reduce intensity.
- Swelling around joints: This is not normal and warrants veterinary attention.
- Behavioural changes: A dog that becomes reluctant to climb stairs or jump onto furniture after starting agility may be experiencing discomfort.
Keeping your dog's parasite prevention up to date is also important when exercising outdoors in spring. Garden environments expose dogs to ticks and fleas. For a comparison of prevention options, see Flea and Tick Prevention for Dogs Compared (2026).
When to Call Your Vet Immediately
Contact your veterinary practice without delay if you notice any of the following during or after a fitness session:
- Sudden, non-weight-bearing lameness (the dog will not put a paw down at all).
- Visible joint swelling, heat, or deformity.
- Yelping or crying when a specific area is touched.
- Collapse, extreme lethargy, or disorientation, which may indicate heatstroke or a cardiac event.
- Persistent vomiting or pale gums after exertion.
Dogs that exercise in gardens during spring are also at increased risk of leptospirosis from standing water or wildlife urine. If your dog develops fever, lethargy, or muscle pain after outdoor exercise, seek veterinary advice promptly. More detail is available in Leptospirosis in Spring: Emergency Steps for Dogs.
Maintenance and Seasonal Care
- Inspect all equipment before each session. Check for cracks in PVC, splinters in wood, and loose screws.
- Store PVC components in a shed or garage when not in use; prolonged UV exposure degrades plastic over time.
- Re-sand wooden surfaces at the start of each season.
- Replace non-slip tape as soon as it begins to peel.
- If using timber stakes in the ground, check for rot at ground level every few weeks during wet weather.
Adapting the Course for Different Dogs
Senior Dogs
Lower all obstacles to minimum heights. Emphasise cavaletti rails and balance platforms over jumping. Keep sessions to 5 to 8 minutes. Senior dogs benefit greatly from gentle proprioceptive work, which can help maintain mobility and confidence. For related nutritional support, see Senior Dog Nutrition: Spring to Summer Diet Guide.
Puppies (Over 12 Months)
Limit jumping to ground-level bars only until growth plates are confirmed closed by a vet. Focus on body awareness exercises like weave poles and flat platform work.
Small Breeds
Scale all dimensions down by roughly 30 to 40 percent. Use narrower PVC (20 mm for poles and rails) and a smaller balance platform (40 cm x 40 cm).
Large and Giant Breeds
Use sturdier timber supports and wider jump bars. Ensure the balance platform can support the dog's full weight without flexing. Giant breeds are more prone to joint issues, so keep jump heights conservative and prioritise low-impact stations.
Cost Summary
A realistic budget for all four stations:
- PVC pipes and connectors: £15 to £25
- Timber and plywood: £20 to £35
- Hardware (screws, cable ties, glue): £5 to £10
- Non-slip tape and paint: £5 to £10
- Tools (if not already owned): variable, but a basic hand saw and drill set can be found for £20 to £40
Total estimated cost: £45 to £80 for materials, assuming basic tools are available.
Frequently Asked Questions
How much space do I need for a DIY dog agility course in my garden? ↓
At what age can a puppy start using a garden agility course? ↓
How high should agility jumps be set for a beginner dog? ↓
What materials are safest for building DIY dog agility equipment? ↓
How often should my dog use the fitness course each week? ↓

Emma Lawson
Practical Pet Care Educator
Practical pet home care specialist — clear, step-by-step guidance grounded in veterinary nursing standards.
Content Disclosure
This article was created using state-of-the-art AI models with human editorial oversight. It is intended for informational and entertainment purposes only and does not constitute veterinary medical advice. Always consult a licensed veterinarian for your pet's specific health needs. Learn more about our process.